
Welcome to Forage Friday. On the first Friday of the month, we will cover topics related to forages. We will discuss grazing and forages for the next couple of months.
Grass Farming?
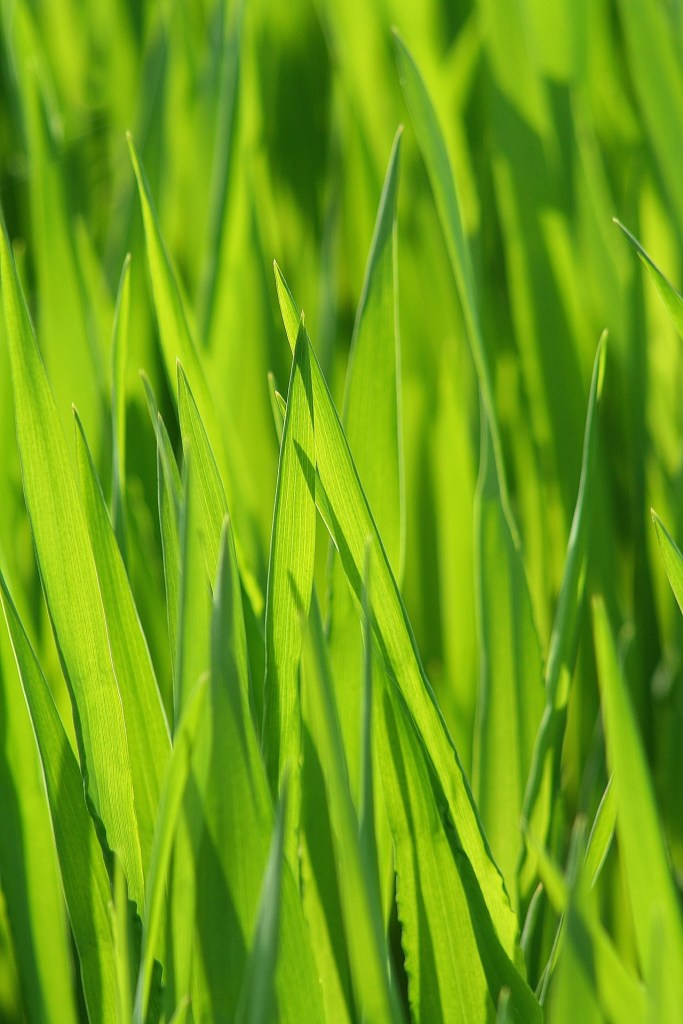
If you have animals that require forages, and you plan to grow those forages, congratulations! You are a grass farmer. The plants are the cornerstone of this whole forage system. So, what’s up with grass farming? Why is it important? Where do you start? The ground is already overgrazed. How do we fix that? Is it worth the time and energy? What does this look like in terms of management? What is convention grazing vs rotational grazing? Is it all worth it?
These are just some of the questions you may have asked yourself. Even if you’re just starting out or have been farming for years these questions seem to keep coming up. Having good pastures is a process. It cannot be done all at one time. It takes time and energy to get your system right.

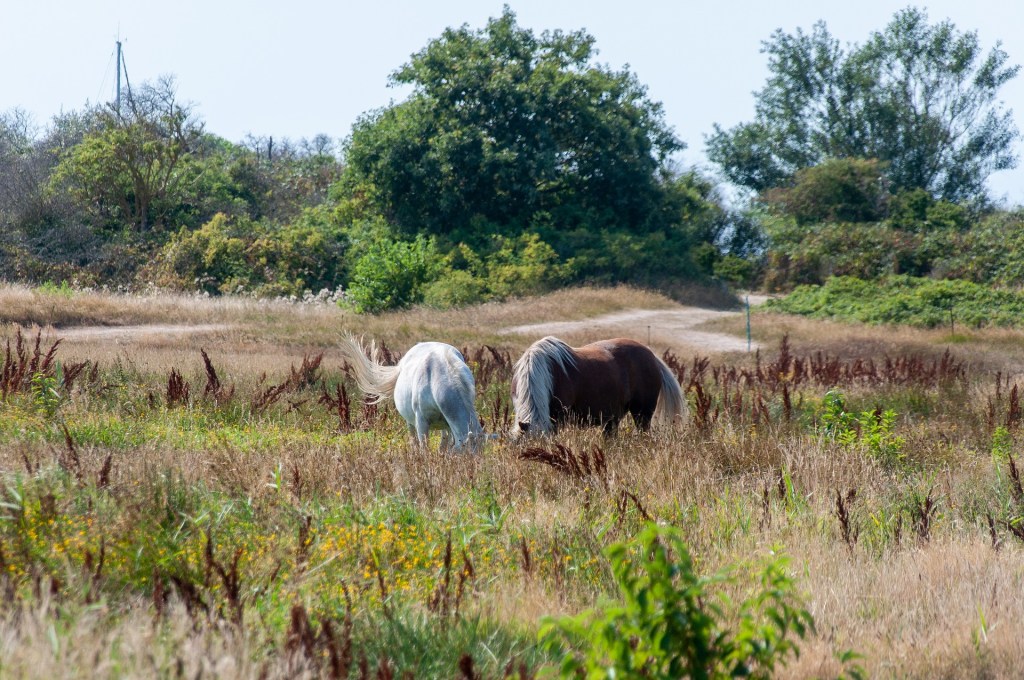
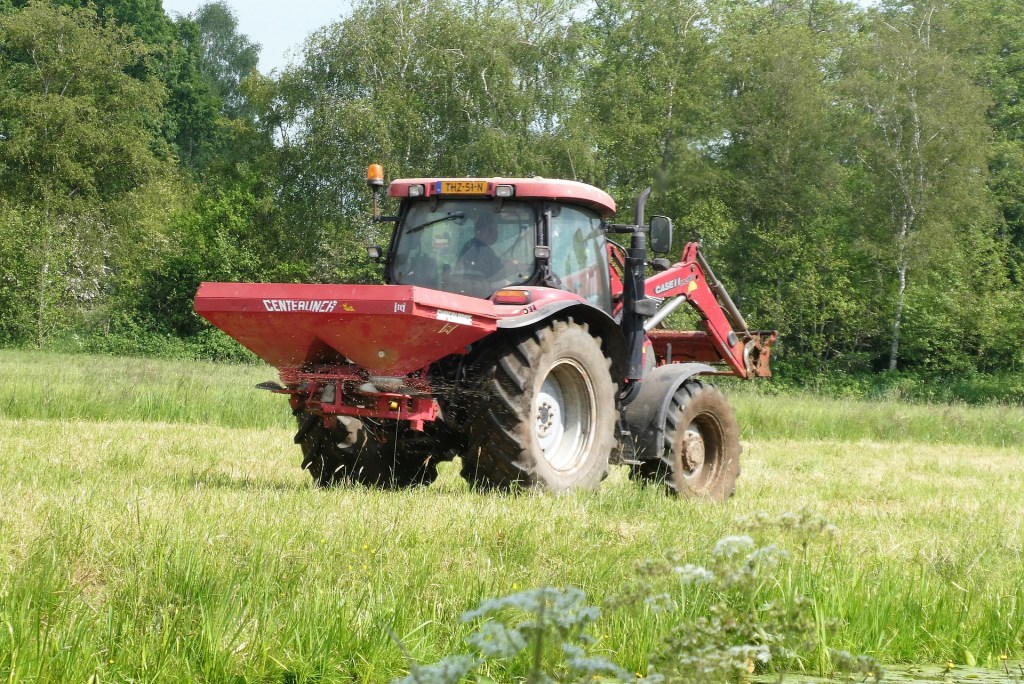
There are so many benefits to healthy pasture and rotational grazing. You may ask yourself what rotational grazing is. Rotational grazing is the practice of managing livestock by moving them through small pastures called paddocks. This allows other areas to rest and regrow, while animals graze other areas. Rotational grazing is able to be implemented on a small operation to very large operations and everything in between. Like anything worth doing it takes some time and effort. There are a lot of moving parts to being a successful grass farmer. So, I will attempt to break it down into small chunks. There is a lot of information out there about forages and grazing but it can all get very confusing. We will take each part and break it down. Feel free to comment if you have questions.
Soil Sampling
The number one thing you need to do is take soil samples. This step is crucial. It will be the foundation of our whole grazing system. If you are unwilling to do this step, then nothing else here will matter. Soil is one thing on your farm you need to know about. A lot of decisions are made using your soil test. This is how you customize your farm operation to work for you. I have a quick and dirty article about soil sampling. The difference is that you need to take several samples across a larger area. This will give you a good idea of what you require for your farm. Fall is a great time to do soil tests. When looking at rotational grazing, you need to take samples every 4-5 years. This is to ensure your soil has everything it needs. This will help grow your forages well. You will need to make some decisions. Decide whether you are renovating an existing pasture or establishing a new pasture. This decision will change the recommendations that are needed for your soil. In my experience most people can renovate pastures without starting over. The few people I have helped establish new pastures are usually turning previously crop land into forages. I have also helped a few farmers establish new pastures after construction was one on their property.
Sometimes land has been worn out or not cared for. This can lead to nutrient deficiencies that will lead to forage failure. Poor yields and seedling failing to sprout can all be caused by poor soil and nutrient deficiencies. A basic soil sample will give you recommendations for your pastures. It should give you recommendations for Lime, Nitrogen (N), Phosphorus (P) and Potassium (K). You need accurate analysis. This is why it is important to get a soil test done and at a quality soil testing lab. At home tests are not reliable and rarely correct.
How to Take a Soil Test
I have an article on the basics of a soil test. This is where a topographic map of your property would be helpful. You can plan the best places to take your soil test. Take a core sample where each of your pastures are situated. I would do about 10-15 cores and mix in a plastic bucket. Do not sample near roads, foundations, field borders, eroded spots, sandy areas or anywhere forage has been fed. Stay around 150-200 ft away from these areas. If it is wet, let cores dry before sending them to the laboratory. Make sure you follow their instructions if you would want any delays.

When you receive your results from your soil test, you should have some recommendations. These will guide you on what to add to your soils to make them the most productive. Follow those recommendations based on your specific soil test. If you are interested in soils, there are numerous books and publications that can discuss the details of soil preparation.
The Results Are In!
Once you get the test results back from your samples you should have the information on;
- Soil pH,
- Buffer of pH,
- Phosphorus (P),
- Potassium (K)
- Organic matter
- Cation Exchange Capacity (CEC).
You may want to consider testing for magnesium or other elements if it is known that your area is deficient. Don’t worry if you forgot your chemistry from high school. I’m going to go through each one of these, so you don’t have to dig out your old chemistry books.
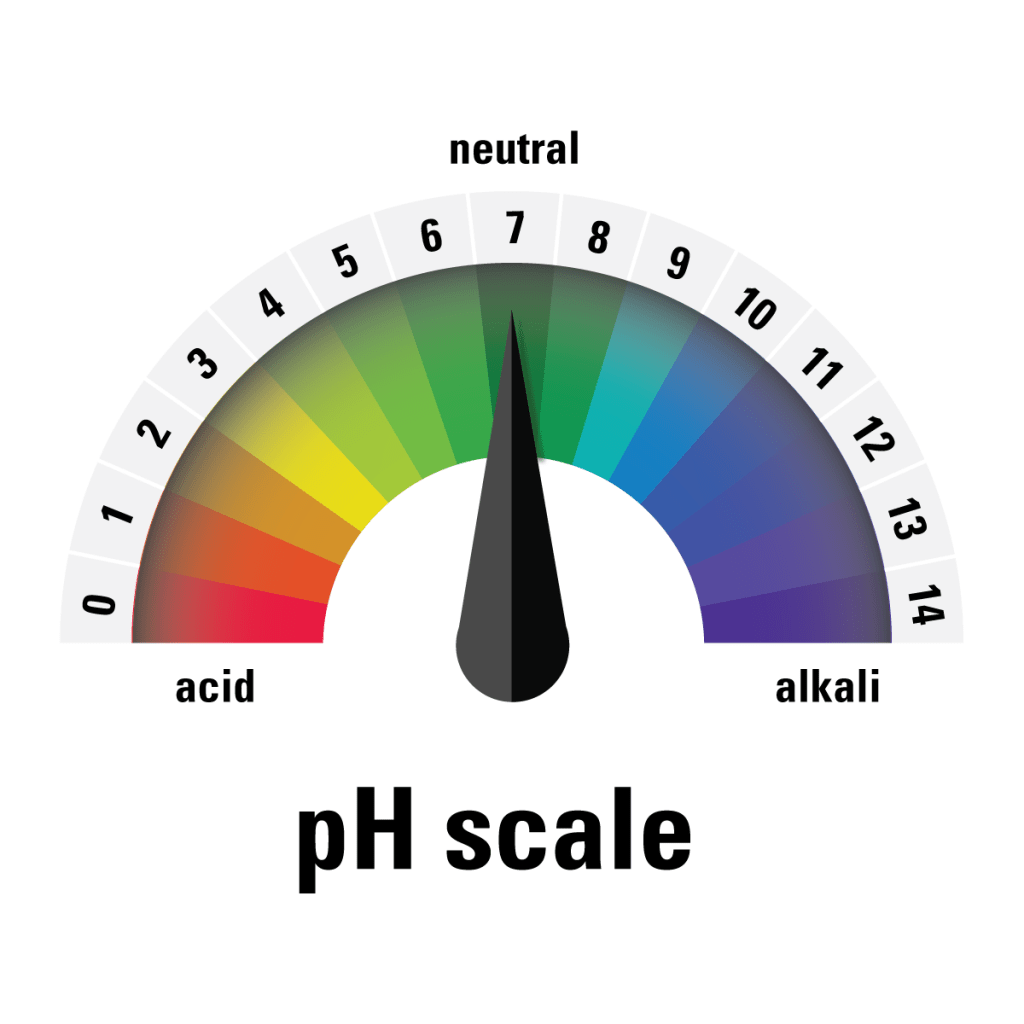
Soil pH, – It will tell you if your soil is more acidic or basic. Most forages grow around pH 7 or just slightly more acidic around pH 6.8. If the soil pH is too high, it can inhibit the plant’s ability to use some of the nutrients in the soil. If it is too low, it can also prevent nutrient absorption. This is important to fix the soil pH. Often this is done with lime, to raise the pH or sulfur to lower the pH.
Buffer pH – This is important. It determines the amount of lime or sulfur needed to change the acidity of the soil. In other words, this is the amount the soil will resist the change to a different pH.

Phosphorus (P)– Phosphorus is an element on the periodic table. The symbol is P. That is why you will see P used as shorthand for phosphorus. Phosphorus is essential for plant growth. This is key for root growth and chlorophyll production. It is beneficial to soil microbes. It also helps energy transfer within the plant. When this is lacking we then to see the plant turn a purple or bronze color and will stunt leaf growth
Potassium (K) – like phosphorus, Potassium is an element on the periodic table. The symbol which is K. Again we use K as shorthand for potassium. Potassium is essential to strengthen grass and plant roots and help the plant absorb nutrients from the soil. Potassium fights off disease and helps plants deal with stress.
Organic matter – Organic matter is crucial when starting to improve your soils. Organic matter helps improve soil quality by helping improve soil drainage, aeration and water holding capacity. It acts as a reservoir for nutrients and prompts healthy root growth. Organic matter also helps protect against drought and erosion.
Cation Exchange Capacity – No Cat were harmed with this test. Commonly denoted as CEC on tests and documents. Naturally soil is negatively charged. Clay and organic matter that are negatively charged. These control how other elements with positive charges move through the soil. They determine if these elements are available for plants to use. CEC holds these nutrients in the soil. Nutrients such as calcium, potassium, and magnesium and several other micronutrients. This means the higher the Cation Exchange Capacity, the more the soil can hold these nutrients. More nutrients become available for plants to use.
Nitrogen (N) – I purposely mention this last. Just like Phosphorus and Potassium, we use N as shorthand for Nitrogen. Nitrogen is a tricky element especially in soil tests. Nitrogen moves through soil and it can be tricky to get right. Many times when you get the other areas right, you can save significant amounts of money. You may not need as much nitrogen as you originally thought. Nitrogen is responsible for the green lush growth that happens really fast. This makes everyone feel good but it is short lived if the other factors in your soils are not addressed. Nitrogen can move quickly through soil and end up in water runoff causing more trouble in the environment. Nitrogen can lead to poor growth later in the season. We need to make sure we are using nitrogen to its best advantage. This will save you money.
This is a quick overview of what you should find in a basic soil test. I have an article already if you need more guidance on how to do a soil test. https://anythingagriculture.com/2024/09/12/soils-is-not-dirt/
Decisions, Decisions
Now is the time of decisions. Are you renovating an existing pasture or are you going to till and replant the pasture? Booth decisions have drawbacks and benefits.
When renovating an existing pasture, this will require less limestone. They are not tilled before you apply the limestone. As a result, it can take longer for the lime to become incorporated. It may be 8-12 months or longer before the limestone has a chance to bring down the pH.
Establishing a new pasture is another business. You will need time and equipment. It is also a time to make decisions about forages. You need to determine what types will be right for you and your operation. Not all old worn out pastures need to be newly established. However, ground not currently in pasture will need a lot of work to get ready. You may have to till in your amendments to the soil to make it ready for forage in new ground.
Adjusting Soil pH With Lime
I hear a lot of people talk about adding lime. However, I’m not sure everyone knows what they are doing when they add it. Adding lime to soil to adjust the pH is a requirement for optimal growth. If your test indicates that your pH is low, you will most likely be adding limestone. It is best to apply limestone 6-12 months before seeding your pasture. It takes the bioactivity in the soil to break down the limestone, so it is usable by the plants. So, you may not see any difference for several months. Remember you are building good soils for growth. It takes time to build good soils and great pastures.
(N) nitrogen (P) phosphorus (K) potassium or NPK
When looking at the rate of application for NPK, it is important to realize this. The application rates will be different for a renovated pasture compared to establishing a new pasture. Renovated pastures will likely have lower rates for P and K. This is because there is manure high in these nutrients. Some estimates of the P in manure, depending on the species, are as high as 80% for Phosphorus. Estimates for K are more than 50% for Potassium. When doing rotational grazing, these waste products are more evenly distributed. This distribution leads to needing to add less P and K. This reduction saves you money.
Let’s talk (N) Nitrogen
This is a tricky amendment. It is really satisfying to dump a lot of nitrogen on your grass and watch your grass grow like crazy. But there are a lot of issues adding Nitrogen with no recommendation. It can actually weaken your forage and lead to a weak pasture. Most soil tests come with nitrogen recommendations. There are plenty of tables and complicated mental gymnastics to add nitrogen. That is because there are several factors that affect it. Lets dig in.
Let’s look at a renovated pasture. What species do you have? Is it all grass or grass and legume? Do you have a survey of what is in your pastures? Do you have cool season grasses or warm season grass or a mix?
It starts getting complicated. Much of the literature discusses forage in terms of its yield in weight. It can be very hard to estimate this if you have never done it before. This is what realistically can be harvested from the pasture. A tall but thin pasture can yield less than a thick shorter pasture. One way to do this is to take a 1ft by 1 ft part of the pasture. Cut the usable forage, but not to the ground because this would damage the plants. Then weigh it. They multiply that by the size of your pasture in ft. This will give you an estimate of what is available in your pasture. The literature likes to talk about the forage goals of your pasture. . This is usually done in tons per acre. This is highly dependent on what species are growing. Also what is a realistic goal for your farm? This number can be used to figure out how many animals you can realistically put on that pasture. This helps to determine how to maximize your yield with minimum input. This This is where you save money.
A realistic goal for a pasture with tall growing cool-season grasses is about 4 tons of dry matter per acre. If the pasture has over 30% legumes then there is generally no need to add nitrogen.
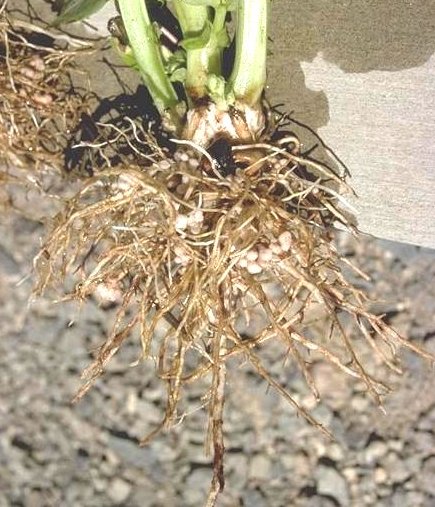
The Power or Legumes
Why is adding legumes great for rotational grazing?
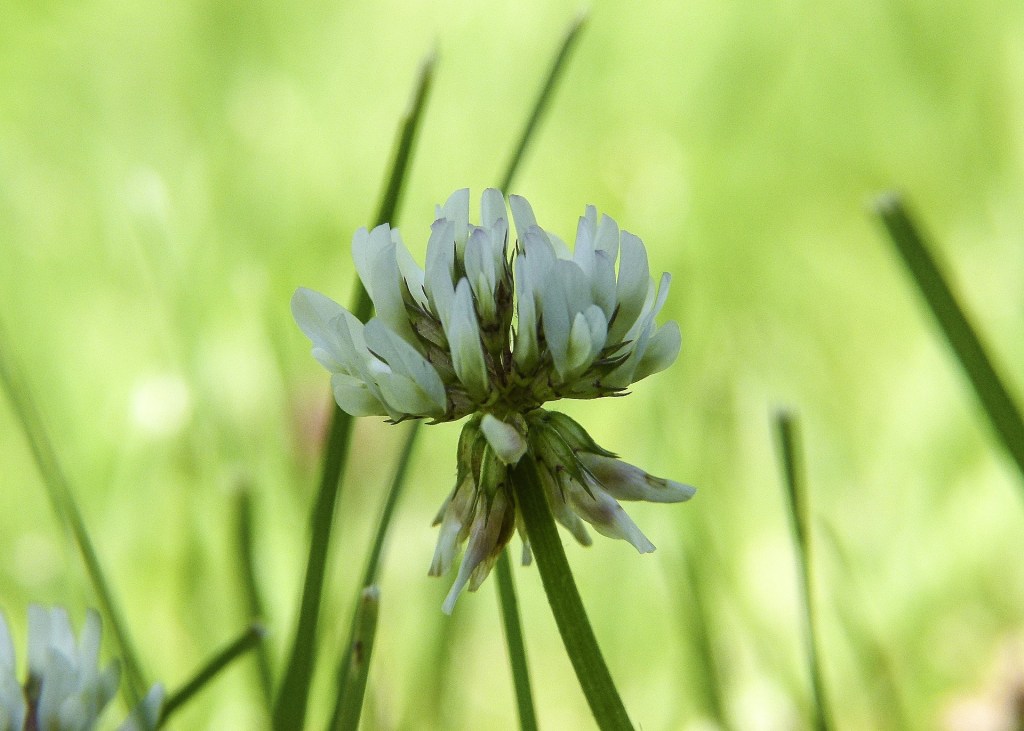
Legumes have been largely dismissed but recently they have started to gain some notice. This is because legumes take nitrogen from the air and ‘Fix” it with nodules on their roots. They produce their own nitrogen. If they are healthy, they will produce more. Essentially, in a few sessions they will fertilize the grasses around them. Clever little plants.
Timing of applications of soil amendments are just as important as how much. Doing it right can save time and money and create a great pasture.
Timing of Nitrogen
The best way to apply nitrogen to cool season grass pasture is to do half the application in early spring. Aim for mid to late March. Apply a quarter of the nitrogen a few months later in late spring. Do this around the end of May. Apply the remaining quarter in late August. The last application gives a boost to the late cool season grasses to extend the grazing season. Of course this is all relative based on how much rain has occurred. If drought conditions exist, nitrogen availability to the plant is affected. Adding another application without sufficient rainfall could burn your forages. So it is important to be aware of the local rainfall.
For Warm Season Grasses
For warm season grasses apply nitrogen in late April after the grasses have broken their dormancy. This will give them a boost to get them producing for the summer.
Mixed Pasture
For a mixed pasture, you may need to determine if your grasses need the nitrogen. As always you will need to take the weather into consideration. I previously mentioned that if the weather is dry, skipping the last summer nitrogen application could be a better choice. If the weather is dry, it might be wise to skip the last summer application of nitrogen. Alternatively, consider skipping the last application entirely. If it has been particularly wet, adding more nitrogen might be counterproductive. It could give more growth and weaken the plants. On the other hand, it may need the nitrogen as the water has washed too much away. Being aware of how the rain behaves on your property is important. Especially if you have a lot of hills or are near a watershed. You would want to limit runoff of nitrogen. This is where it pays to be observant of your pastures.
Animal Issues
Horses have a lot of trouble with nitrogen application to pastures. It is best to keep horses off pasture where nitrogen has been added. Make sure there has been enough rainfall to incorporate the fertilizers into the ground. Wait until there is no evidence of any fertilizer before you put animals back on the pastures.
(K) Potassium

Potassium should be applied once a year if needed. It is best to apply potassium to pasture in late summer. This timing allows the plant to take up as much potassium as possible before winter dormancy.
(P) Phosphorus
If phosphorus application is necessary this can be one once a year. A fall application of phosphorus allows it to be incorporated into the soil. It will be ready for spring plants to use. The right amount of phosphorus should not run off. It should stay where the plant can use it. Make sure you do this with soil test results. Make sure the plants are actively growing to when making application to a renovated pasture
You will want to pull animals off pasture after fertilizing. Animal eating fertilizer can cause trouble with the health of the animals. Wait until all of the fertilizer has been incorporated into the ground. Usually after a good rain or two.

Amendments don’t have to be scary to do it right. Just adding a NPK fertilizer is a waste of money and potentially bad for the environment. For years the old timers would recommend using a 10-10-10 or something similar to fertilize everything. It turns out this is contributing to a decline in water quality. Fertilizers have even been found in wells. This also destroys watershed environments and wildlife. We need to work together with nature to be successful. Not only that but it doesn’t give your soils what they need. I have seen soil tests where the phosphorus levels are extremely high. In such conditions, plants cannot utilize any of the micronutrients.
Hope you enjoyed this article please like and subscribe to my blog. There will be another installment of forage Friday on the beginning Friday of each month. Please like and subscribe to my blog and newsletter. Help me keep writing. Thank you
Thank you for reading! If you want more information and updates, please subscribe to my newsletter. Get the latest blog posts and new offers right in your email. It’s free to subscribe, and you’ll receive loads of information at no cost.
Don’t forget to check out Anything Agriculture on social media! Follow us on YouTube, Facebook, Instagram, and Pinterest for more great content. Like and subscribe to stay connected!
Ready to take your homesteading journey to the next level? Book an appointment with me today! With decades of experience, I provide personalized advice to solve any homesteading challenge. Whether you’re a newbie or a seasoned homesteader, I offer expert guidance to make your homestead thrive. Don’t miss out—schedule a chat and unlock the full potential of your homestead with Anything Agriculture. Let’s turn your dreams into reality!


Discover more from Anything Agriculture
Subscribe to get the latest posts sent to your email.
